Before you begin
Setup > Template > Reports
You must modify the Labels Template, in order to print labels for a new class.
Procedure
-
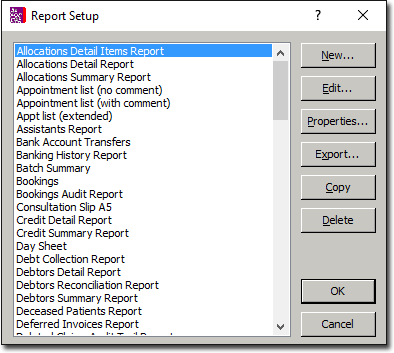
Select from the Bluechip Main menu. The Report Setup window appears.
-
Select Labels and click Edit
-
To increase the size of the label for easy reading, click from the menu bar.
-
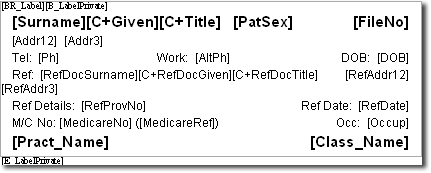
Each class has two label fields, the first begins with [B_LabelClassName] and the second of which begins with [E_LabelClassName].
The very first field in the entire template is [BR_Label] and the very last field is [ER_Label].
These fields must remain at the beginning and end of the template. If you are going to add a new class to this template, the [ER_Label] field will need to be moved to the end of the new label.
-
Scroll through the template and find the appropriate label.
-
Select and copy both relevant fields.
-
Paste the copied information at the end of the template.
-
Modify the [B_LabelClassName] and [E_LabelClassName] fields to the new class name.
-
Delete the [ER_Label] field from the label above and re-enter it after [E_LabelClassName].
-
Save the template and close the window when you have completed the process.