Appointment Groups
A Practice might choose to create a number of Appointment Groups, for example, in order to quickly and easily differentiate between types of specialists.
Before you begin
An appointment group is a predefined group of practitioners from which you can select in the Appointment Book.
Procedure
To manage Appointment Groups:
-
Select . The Appointment Group Setup window
appears.
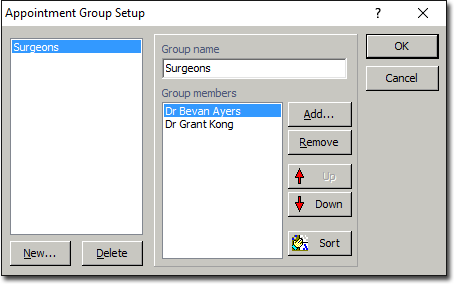
- To delete an Appointment Group, select the Appointment Group from the list at
the left side of the window, and then click Delete.
Note:You will not be prompted to confirm this action.
- To edit an Appointment Group, select the Appointment Group from the list at the left side of the window. Make changes as necessary. You can change the name of the Group, and add/remove Group Members. Click OK.
- To add a new Appointment Group, continue now to Step 2.
- To delete an Appointment Group, select the Appointment Group from the list at
the left side of the window, and then click Delete.
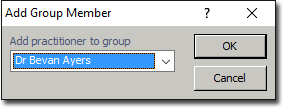
-
In the Add Group Member window select a practitioner from
the list.
Results
Note:
Practitioners appear in the Appointment Book in alphabetical
order, regardless of the order in which they were added to the group.
