Before you begin
Setup > Practice > Classes
Procedure
-
Select . The Class Setup window appears.
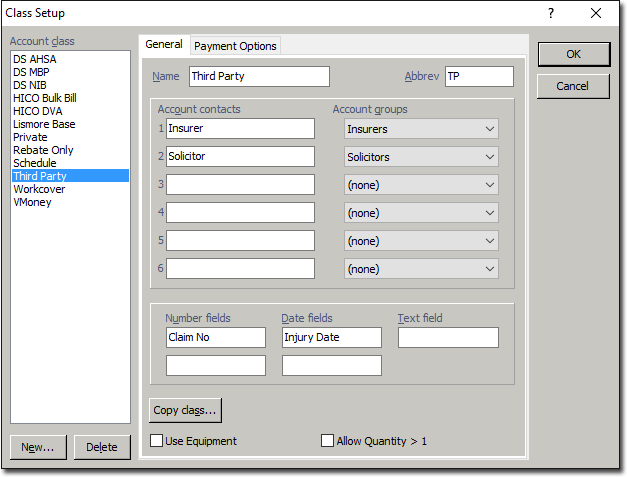
If you want to edit an existing class, select the class, an then make the necessary modifications to the General and Payment Options tabs. Alternatively, if you want to create a new Class, continue now to step 2.
-
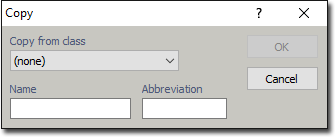
Click New The Copy window appears.
-
As you are creating a brand new Class, leave the Copy from Class drop-down list set to display 'none'.
-
Enter a name for the new class.
-
Enter an abbreviated name for the new class.
-
Click OK. to confirm and save your selections. The new class is added to the list of account classes.
- (Optional) You can enable Quantity / Equipment ID items via the Use Equipment and check boxes. You can also specify the use of radiology oncology equipment for Medicare-related batches.
-
Once you have created a Class, you can create a letterhead field that refers to it.
- If you want to do this, it must be done for each practitioner who intends to use a letterhead for the class.