Single Appointments
Create a single appointment from the Appointment Book for new or existing patients.
Before you begin
About this task
Procedure
-
In the Appointment Book, from the
Practitioners list, select the practitioner whose
appointment schedule you want to display.
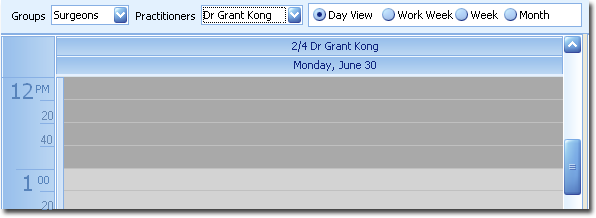
You can also use this menu to display the appointment schedules for a group of practitioners. note: After selecting a group to display, you can show or hide individual members of that group using the secondary Display list. For example, the first image below shows that a group called Surgeons has been selected, and from that group, only Doctor Kong's schedule is currently displayed. The second image shows the same group, but with Doctor Kong and Doctor Ayers displayed. -
To add an appointment, locate an available slot, and then either:
- Double-click the slot.
- Right-click the slot and select New Appointment.
-
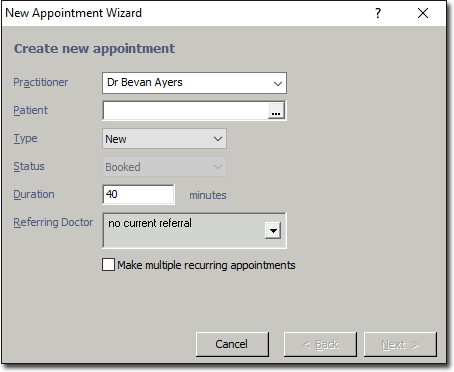
In the New Appointment wizard, click
 to select a patient to
record the appointment for. If the patient is a new patient, start by entering their
family name and press the tab key to open the window where you
can create a new patient record. This calls the window that allows you to create a new patient record.
to select a patient to
record the appointment for. If the patient is a new patient, start by entering their
family name and press the tab key to open the window where you
can create a new patient record. This calls the window that allows you to create a new patient record.
-
The Referring Doctor field automatically displays the
patient's most current Referral (if
available) and Referring
Doctor. If necessary, you can create a new
referral via this window by clicking the
 Down arrow and click Add on the secondary window that
displays.
Down arrow and click Add on the secondary window that
displays.
-
In the Create Single Appointment window, the date and time of
the appointment that you selected from the New Appointment
window will be displayed automatically. However, you can modify these settings.
Either:
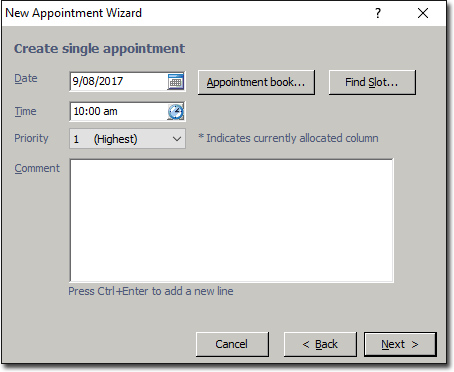
- Manually enter a date.
- Select a date from the calendar by clicking
 Calendar.
 - Find a free slot in the appointment book for the selected practitioner by
clicking
 Appointment Book.
 - Find a free slot in the appointment book for other practitioners by selecting Find slot.
- Enter an appointment time in the Time field or click
 Clock to select an appropriate time.
Results
What to do next
A patient's bookings can be viewed via the Bookings menu item in the Patient
Explorer. You can apply a few quick edits to an appointment from this screen, including:
- Moving the appointment by selecting it and dragging it to another time slot
and/or practitioner.
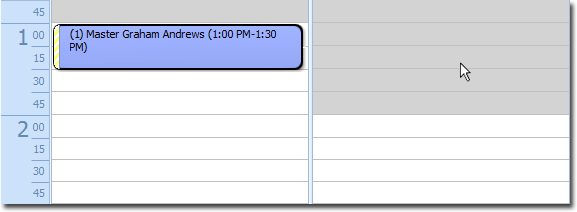
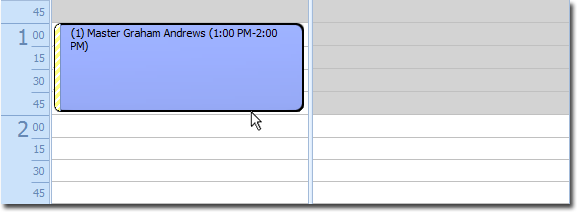
- Increase or decrease the length of the appointment by selecting and dragging the
upper or lower edge of the appointment.
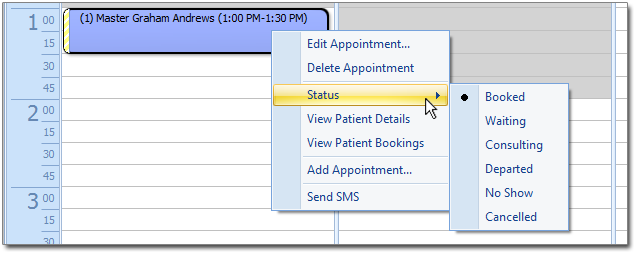
- Indicate the status of an appointment, by right-clicking it, and selecting
Status from the menu that appears. For more information,
see Editing Appointments.