To Apply a Discount when Invoicing
Before you begin
Procedure
- Ensure you have first specified a discount payment period. This is configured via the Payment Options tab of your Practice's Class settings. Without this configured, the Discount check box on the invoice window will not be available when issuing an invoice.
- (Optional) You can specify that particular Service Items are discounted by default. This discount is per item, per practitioner, and configured via the Fees tab of the Practitioner Setup window.
- (Optional) You can print a message about the discount and its terms on the invoice you issue the patient. A default message is supplied with Bluechip, and you can create your own customised messages via the Discount tab of the Message Setup window.
-
Create the invoice, as normal. During the invoicing process, tick the Discount check box. A Discount column appears.
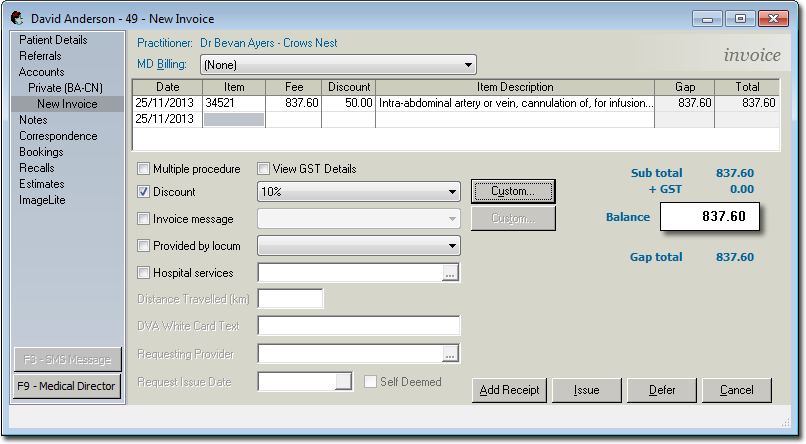
- If you enter a Service Item with a pre-defined discount applied to it, the value of that discount will automatically appear in the Discount column.
- If you want to enter a customised discount, double-click the Discount field and enter a dollar value. The example above shows that a $50 discount has been manually applied to Service Item 34521.
-
(Optional) To the right of the Discount check box is a drop-down menu that allows you to select from any pre-defined Discount Messages you might have, which when selected will appear on the invoice you issue the patient. For example, the default message (named '10%', as shown in the image above) states: "A discount of $[DiscAmount] will be granted if the discounted total ($[DiscTotal]) is received by [DiscPayBy]." When printed, this reads "A discount of $50 will be granted if the discounted total ($450) is received by 13/06/2012", dependant on the actual value of the invoice. From this drop-down list, choose either the default message, or one of your customised messages. You can also click

to further customise any selected message. -
When you are ready to issue the invoice, click

Complete the invoice as normal. The printed invoice example below shows the discounted amount, and associated discount message.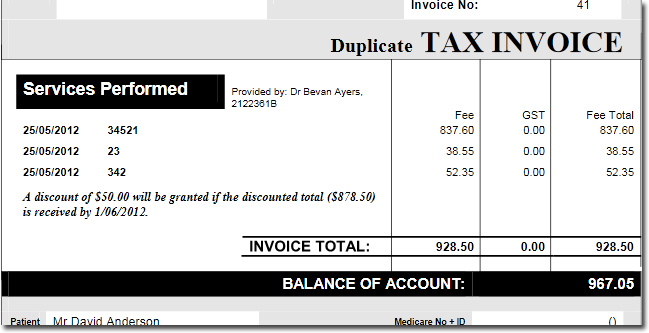
-
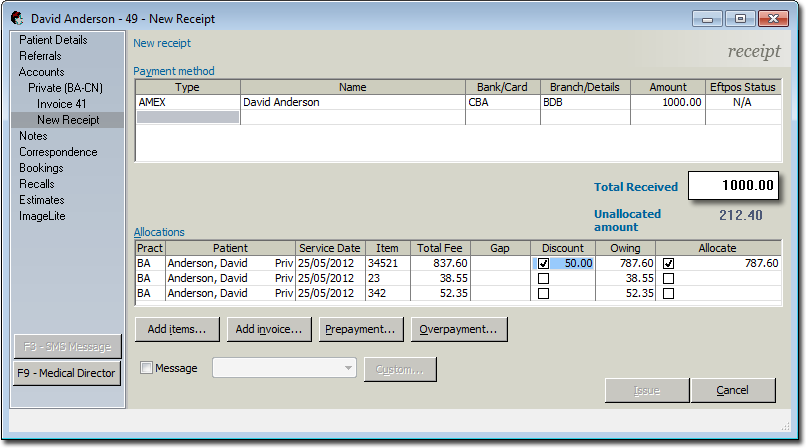
When issuing a receipt, notice that the Discount column (shown below) automatically displays any discounts you have offered. If you are satisfied that the discount should be applied, tick the associated check box, and it is then that the fee for the given Service Item is adjusted. If you do not tick the Discount check box, the discount will not be applied. Note also, that you can override any discount value by double-clicking the value and manually adjusting it.