Editing Appointments

Before you begin

Procedure

  1. Ensure you have elected to access to the Outlook® Style Appointment Book, via Practice Explorer Preferences.
  2. From the Bluechip main window, click Practice Explorer at the bottom-right.
  3. Within the Practice Explorer Margin Menu, select the Appointment Book.
    Example Appointment Book
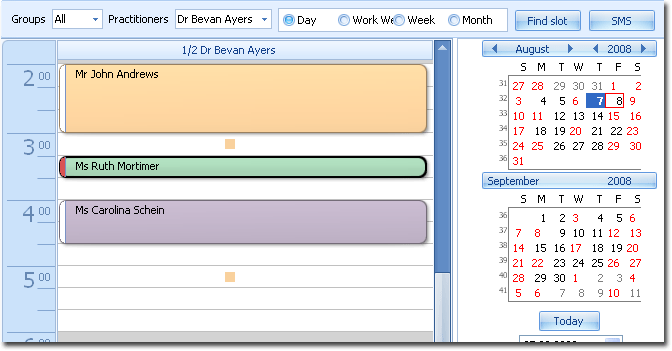
    In the Appointment Book window, you can quickly edit appointments, including:
    • Moving the appointment by selecting it and dragging it to another time slot and/or practitioner.
    • Increase/Decrease the length of the appointment, by selecting and dragging the upper/lower edge of the appointment.
  4. For more-detailed edits, locate the appointment you want to reschedule, and then either:
    • Double-click the appointment, or
    • Right-click the appointment and select Edit Appointment from the menu that appears.
  5. Optionally, in the Reschedule Appointment window, to change the Patient, Practitioner or Type of appointment, click Back. This will take you back to the first screen of the Appointment Wizard where you can then modify those settings.
  6. Modify the appointment date in the Date, via one of the following methods:
    • Manually enter a date.
    • Select a date from the calendar by clicking Calendar button Calendar.
      Example Calender
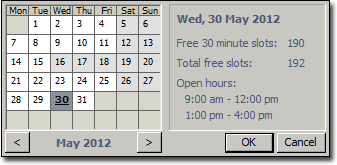
    • Find a free slot in the Appointment Book for the selected Practitioner by clicking Appointment Book button Appointment Book.
    • Find a free slot in the appointment book for other Practitioners by clicking Find Slot.
  7. Modify the appointment time in the Time field or click Clock Clock button to select an appropriate time.
  8. Optionally, modify the priority for the booking. This is necessary only if there is a double-booking.
  9. Optionally, modify any relevant comments in the Comments field.
  10. Click Finish.

Results

The modified appointment is saved. You are returned to the Appointment Book window, where the updated appointment details are now available.