Before you begin
Bulk Bill Account is required to bill the claim for the Medicare Bulk Bill Patient. This verifies Medicare details and fees with Medicare when billing the claim.
Procedure
-
Within the window, select the Accounts margin menu, and then locate an existing account.
- If one exists, double-click it to open it.
- If one does not exist; create a new account by clicking Create new
account.
-
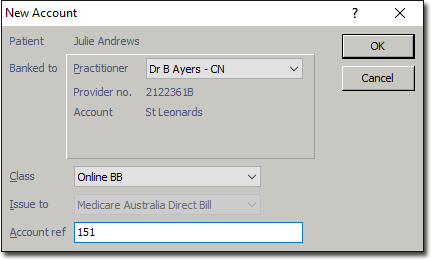
The New Account window appears. Select the required
Practitioner, and Class of 'Bulk Bill'.
-
Click OK. The window appears. Ensure the correct Practitioner and Class (Bulk Bill) has been selected.
- If either the Practitioner or Class has been selected incorrectly, click to display the new account screen again for correct selection.
-
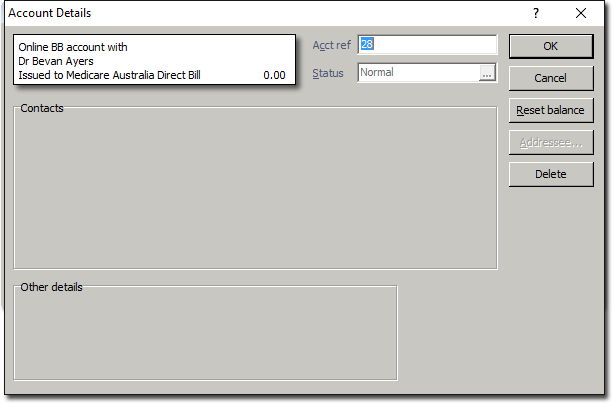
Click OK. The new Bulk Bill account is added to the list of
accounts in the Patient's Record. Double-click the account or select it and click
Open existing account to open the account.
-
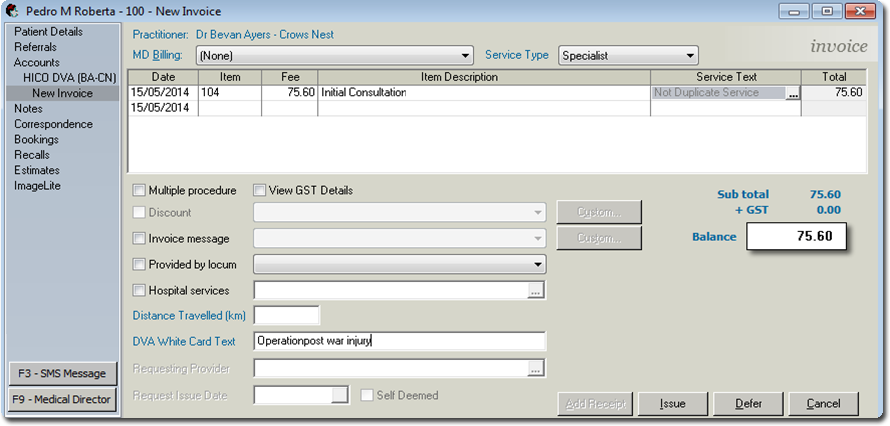
Click New Invoice to begin issuing a new invoice.
-
The Medicare Verification prompt appears.
- Click OK if verification is required.
- Click Ignore if already verified.
-
Select the Service Type if required. There will be multiple
service types only if you have pre-configured this.

-
Enter the appropriate Service Date and Item
Number as desired. A Service Item's fee will appear automatically.
Ensure the fee is correct.
-
Tab to the Service Text field, and double-click in the field
to reveal the
 Ellipsis button. Click the icon to add text for Medicare if required, and then
click OK.
Ellipsis button. Click the icon to add text for Medicare if required, and then
click OK.
-
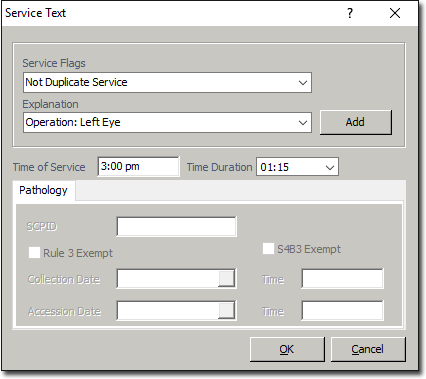
Select the appropriate Service Flag from the drop down
menu.
-
Select the appropriate Explanation from the drop down menu.
If the explanation you want to select does not exist, enter it manually:
- If the explanation is a once-off, tab to the next required field, or
- If you want to save this explanation to use again at a later time, click
Add.
-
Enter Time of Service, Time Duration if required, and then click OK.
- Repeat steps 8 - 12 if additional Service Items are required on the
invoice.
-
On the New Invoice window, click
New
-
When prompted, select the associated Referral, or if a
referral is not required select the appropriate Hospital/ No Referral/Not
Applicable, and then click OK.
-
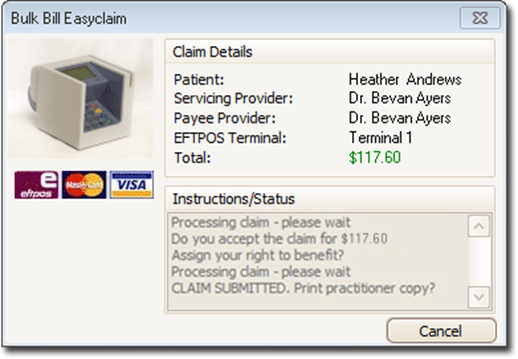
You will be prompted to enter the date-of-issue for the invoice. The default is the current date. Click OK. The TYRO Terminal (Easyclaim) process commences.
If your Practice does not have a TYRO Terminal, the Bulk Bill Claim has now transferred to the Medicare module to be manually-batched to Medicare. Disregard Steps 16 to 18.
-
On the TYRO Terminal, you will be prompted to accept the
claim. Accept Claim to continue.
The total amount displayed in the Patient Easyclaim window is an estimate of the
benefit only. Medicare may adjust the benefit payable in accordance with the rule set
out in the Medicare Benefits Schedule.
-
On the TYRO Terminal, the Patient is prompted to assign their right to the benefit to the Practice by pressing Yes.
Results
Once the patient has assigned the right to benefit, the claim will be processed, and
if successful is submitted to Medicare. You will have the option to print the submitted
claim for the Practice. The TYRO Easyclaim is also transferred to the Medicare Australia
module awaiting payment.