Book recurring appointments for existing patients.
Before you begin
The following information relates to creating a recurring appointment via the Appointment Book. You can also create a recurring appointment via the patient's record.
Procedure
-
Ensure you have elected to access to the Outlook Style Appointment Book, via Practice Explorer
Preferences.
-
From the Bluechip
main window, click Practice Explorer located at the
bottom-right. The Practice Explorer
appears.
-
Within the Practice Explorer Margin Menu, select the Appointment Book. The Appointment Book window appears.
-
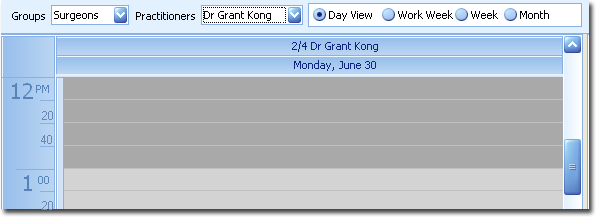
Select the practitioner whose appointment schedule you want to display, using the
Practitioners drop-down list. You can also use this menu to
display the appointment schedules for a group of practitioners. Note that after selecting a group to display, you
can show or hide individual members of that group using the secondary Display
drop-down list. For example, the first image below shows that a group called Surgeons
has been selected, and from that group, only Doctor Kong's schedule is currently
displayed.
-
Select the period of schedules you want to display, for example, Work
Week. You can also use the calendar at the right side to show
different time periods.
-
To add an appointment, locate an available slot, and then either:
- Double-click the slot.
- Right-click the slot and select New Appointment.
-
In the New Appointment Wizard, click
 Ellipsis to select a patient to record the appointment for.
-
Select the purpose of the booking from the Type drop-down list.
-
Enter an appointment duration time if necessary. The duration defaults to the default time recorded for the selected Practitioner.
-
The Referring Doctor field automatically displays the
patient's most current Referral (if
available) and Referring
Doctor. If necessary, you can create a
new referral via this window, by clicking the drop-down arrow and then
clicking Add on the secondary window that appears.
-
Select .
-
In the Create Recurring Appointments window, if you want to
change the date of the first appointment, enter a new date in the
Date field manually or click
 Calendar and select a date.
-
Enter the number of appointments you want to book.
-
Stagger the appointments using the Time Between Bookings
fields:
- Enter the number of days, weeks, or months between appointments.
- Select whether the increment will be based on days, weeks or months.
- Optionally, enter a Best Day / Date in Period. (This
option is not available if you selected Day in
Time Between Bookings.)
-
Enter a preferred time for the appointment in the Best Time
field, either manually or click
 Clock and select a time.
-
Select whether or you will allow double-bookings.
-
Select the number of double-ups you will permit.
-
Click Next.
-
In the Revise Recurring Appointments window, check that this
appointment's schedule is suitable. You can also print the list from here.
-
If you want to make any edits, click the required cell and make the change
manually.
-
If a Next button appears, click it and review any warnings
about the appointments you want to record in the Review Appointment
Warnings window.
-
In the Review Appointment Warnings window, click
Finish.
Results
You are returned to the Patient Bookings window, where the
appointment details are now available. The new appointments are also entered in the
Appointment Book.